
how-to create a thanksgiving garland

HOW-TO CREATE A THANKSGIVING GARLAND
by tiffany bird of simply modern mom
tiffany's website is full of lovely tutorials and crafty ideas. i know we're all excited for halloween at the moment, but i just loved this thoughtful thanksgiving countdown garland. it would be wonderful to make it in time for november first! writing meaningful messages on each paper leaf makes it completely sweet and scrapbook worthy. thanks to you, tiffany!

I love this time of year when we begin to reflect on the many things we are grateful for in our lives. The last couple of years, I wanted to teach my 3-year-old Kaye to express gratitude for the many blessings in her life. Thus began the tradition of our Thanksgiving countdown. A little tradition that began with construction paper chain links a few years ago.
The main idea: Write down one thing we are grateful for each day in November. Each member in the family participate in writing down things they count as blessings. Then we display it somewhere visible as a daily reminder of the things appreciate in our blessed lives.
Last year, I upgraded the construction paper chain links to a leafy garland. Here is a simple tutorial for you to count your blessings in November with a garland. If you make something using this tutorial, please upload pictures of it in our Flickr group to show it off to everyone. You may be featured on Simply Modern Mom.
Supplies:
- paper – white, scrapbook, paper bags, construction, printer, etc.
- scissor
- pencil
- pens
- raffia
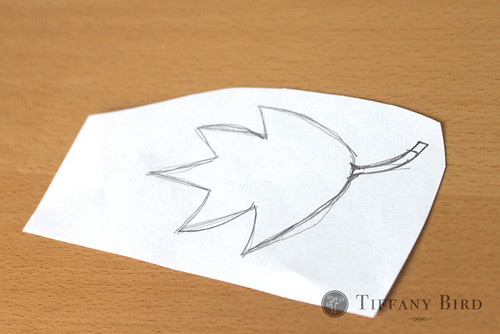
2. Trace the leaf pattern on various different types of paper.
Trace 30 leaves for each day in November.
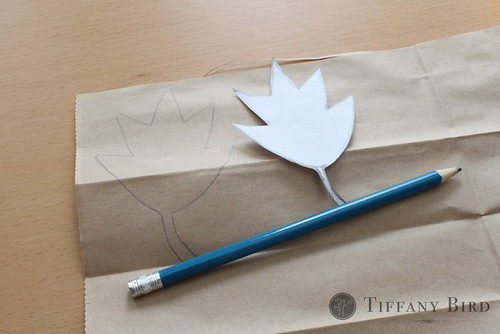
3. Crumble the paper with the tracing on it. Then smooth out and cut.

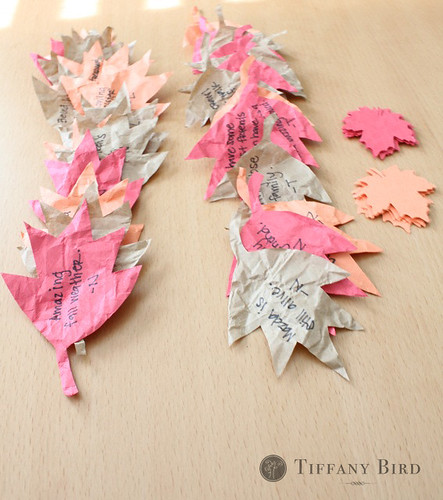
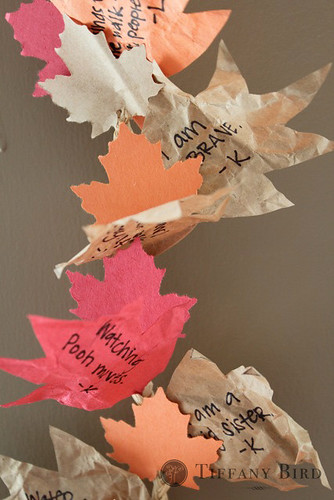
4. Give each family member a few leaves and have them write their blessings.
Cut out smaller size leaves to put in between the large leaves. Luckily, I had a large leaf punch.
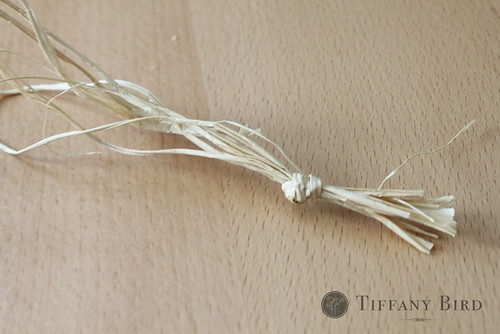
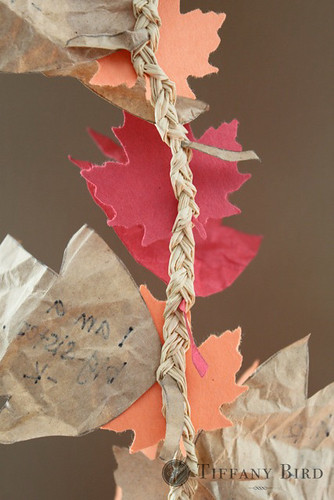
6. Gather about 6 or 9 strands of raffia and tie a knot on one end.
7. Begin braiding. Braid about 3-4 inches before adding leaves into your braid, sticking the stem of the leaf into your braid.

8. If you are using the small leaves for a fuller garland, insert the small ones into some of the braids between the larger leaves. Keep going until all the leaves are gone or you have reached your desired length. Make sure to do 3-4" of plain braids before ending the raffia with a knot. If you need a longer length, add more raffia into the braid.
Here is a backside and finished view of the garland.
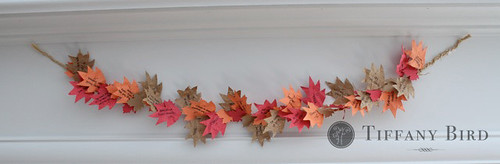
Happy November.
the how-to series is here to encourage confidence in the creativity and skills you have to offer. i am excited to showcase your talents, especially holiday ideas! if you have something to share, please submit your how-to guest post by emailing it and a couple coordinating images to me: marta at martawrites dot com. i will be delighted to feature your post in the future.
"Do not let what you cannot do interfere with what you can do." - John Wooden
![]()


10 comments:
very cute blog!! :)
check us out:
http://thelaplaylist.blogspot.com
- Jessel
Such a great idea! Super cute! I posted a link: http://ificould-ificould.blogspot.com/2010/10/thankful-garland.html
Thanks for sharing!
Missy
Love it. I'm totally doing that this season! Thanks!
Love this garland! Thanks for the tutorial.
i love, love, love this!! thank you. i will definitely be adding this to my fall decor... my children will love it!
What a great idea! Thanks for sharing!
such a fun idea!
Love this fall garland, thanks for sharing:)
This is a simply wonderful idea. Thanks for sharing!
That's a super cute idea. I wish I'd thought that far ahead.
Post a Comment